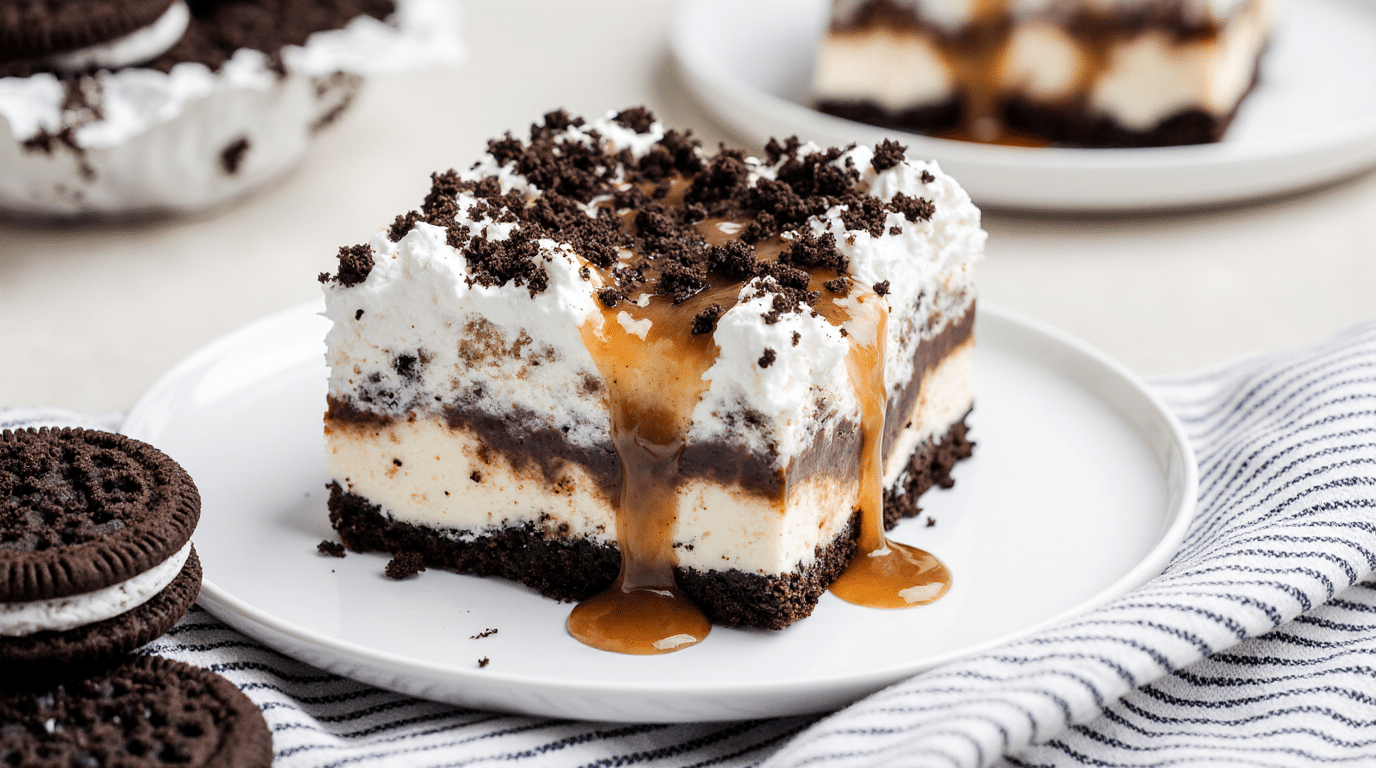
Simple Oreo Ice Cream Dream Cake: The Ultimate No-Bake Treat
Hello! I’m Elina, and I have a confession. I used to dread summer birthdays. It’s always too hot to bake, and let’s be honest, those store-bought ice cream cakes can be… well, a little sad. I remember one year, for my nephew’s party, I decided I’d finally try making my own. I wanted something that looked amazing but didn’t require me to turn on the oven. That’s when I first created this Simple Oreo Ice Cream Dream Cake. It was an absolute smash! The kids went wild for it, and the adults kept asking for the recipe. It’s become our family’s official celebration dessert, and it’s so easy, it almost feels like cheating. This is that Simple Oreo Ice Cream Dream Cake recipe, and I’m so excited to share it with you.
Table of content
Table of Contents
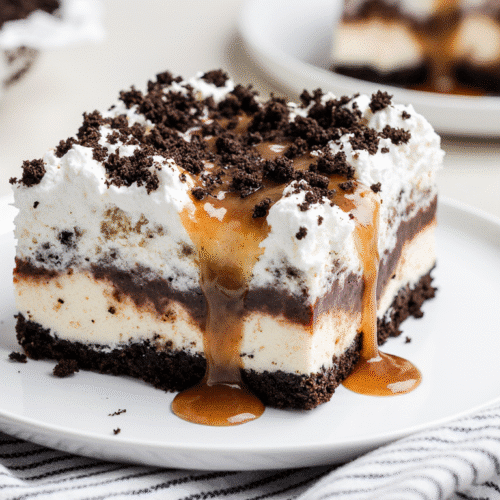
Simple Oreo Ice Cream Dream Cake
Ingredients
1 package (14.3 oz) regular Oreo cookies, divided", "1/2 cup (1 stick) unsalted butter, melted", "1/2 gallon (1.5 quarts) cookies and cream ice cream, softened", "1 jar (11-12 oz) hot fudge sauce, room temperature", "1 container (8 oz) frozen whipped topping, thawed
Instructions
- Place 36 Oreo cookies (leave the rest for topping) into a food processor. Pulse until you have fine crumbs. If you don't have a food processor, use a large zip-top bag and a rolling pin
- In a medium bowl, combine the Oreo crumbs with the 1/2 cup of melted butter. Mix until all the crumbs are moistened.
- Press the crumb mixture firmly and evenly into the bottom of a 9×13 inch pan. Use the bottom of a measuring cup to pack it tightly. Place the pan in the freezer for at least 15 minutes.
- Remove the ice cream from the freezer and let it sit on the counter for 10-15 minutes to soften (it should be spreadable, not melted).
- Spread the softened cookies and cream ice cream in an even layer over the chilled Oreo crust. Cover with plastic wrap and return to the freezer for at least 1 hour, or until firm
- Once the ice cream is firm, pour the room-temperature hot fudge sauce over the top and spread it into an even layer. Be quick so it doesn't melt the ice cream. Cover and freeze for another 30-45 minutes.
- Gently spread the thawed whipped topping over the set fudge layer. Crush the remaining Oreo cookies and sprinkle them evenly over the top.
- Cover the cake tightly with plastic wrap, then a layer of aluminum foil. Freeze for at least 4 hours, or preferably overnight, until completely firm.
- Before serving, let the cake sit at room temperature for 5-10 minutes. Use a large knife dipped in hot water (and wiped dry) to cut clean slices.
Notes
Nutrition
Why This Oreo Ice Cream Cake is an Absolute Dream
Why This Oreo Ice Cream Dream Cake is an Absolute Dream
The Magic of a Truly Simple No-Bake Dessert
Let’s talk about the magic of a no-bake dessert. When the sun is high and the temperatures climb, the last place any of us want to be is standing over a hot oven. This is where the beauty of a no-bake recipe truly shines. It allows you to create an impressive, show-stopping dessert without generating any extra heat. This Simple Oreo Ice Cream Dream Cake is the perfect example. It’s a recipe built on assembly and patience, not on complicated baking techniques. Unlike a dense, no-bake cream cheese dessert like a cheesecake, this recipe is all about light, refreshing, frozen layers. It gives you that perfect dessert ice cream experience in a sliceable, party-ready form.
Moreover, “simple” is the key word. We all live busy lives. We want to bring something wonderful to the table, but we don’t always have hours for a multi-stage baking project. This Simple Oreo Ice Cream Dream Cake is a game-changer. Because it relies on layering and freezing, you can easily break up the process. This removes the stress from dessert. If you are a fan of easy, oven-free treats, this cake will be as satisfying as my No-Bake Chocolate Peanut Butter Bars, which also save you on a hot day. The appeal of this Simple Oreo Ice Cream Dream Cake is its universal, crowd-pleasing flavor. It’s the nostalgic taste of cookies and cream, presented in a fun, celebratory form.
Understanding the Core Layers of Your Dream Cake
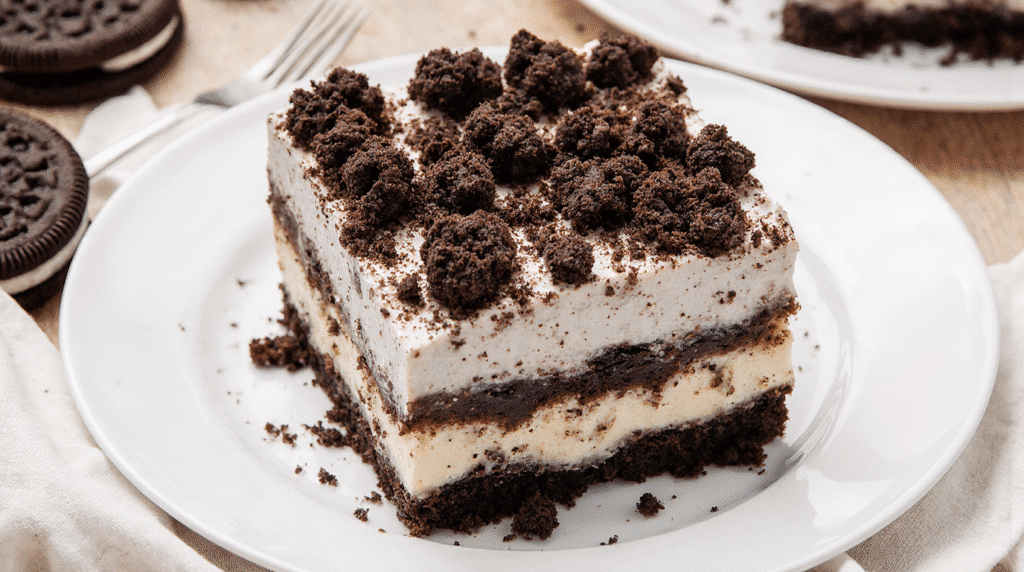
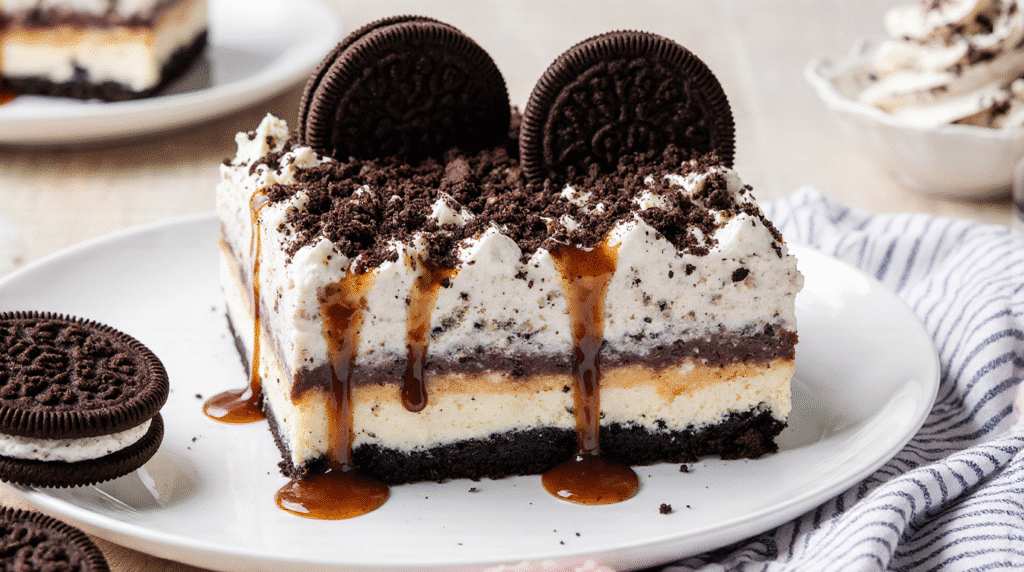
A truly great dessert is all about the contrast of flavors and textures. This Simple Oreo Ice Cream Dream Cake has it all, and it’s built on four perfect layers that work together. Each component plays a specific, important role.
First, you have the foundation: the crust. This is not a soft, spongy cake base. Instead, we create a crisp, crunchy, and intensely chocolatey crust from crushed Oreo cookies and melted butter. This layer provides the structural support for the whole cake. More importantly, it adds a vital, crunchy texture that contrasts perfectly with the creamy layers above it.
Second, you have the heart of the cake: the ice cream. We use a high-quality cookies and cream ice cream. You let it soften just enough to become spreadable. This layer is thick, cold, and already packed with more cookie pieces, making it the ideal filling for our Simple Oreo Ice Cream Dream Cake. It’s the primary flavor and the source of that cooling, refreshing quality.
Third, you have the rich, decadent center. We pour a generous layer of hot fudge sauce right over the first ice cream layer. This is what makes this Simple Oreo Ice Cream Dream Cake feel so luxurious. As it freezes, it becomes a thick, chewy, fudgy ribbon that cuts through the creaminess. This deep chocolate flavor is intense, much like the gooey center of my Ultimate Fudgy Brownies, but in a perfectly frozen form.
Finally, we add the topping. We spread a light, fluffy layer of whipped topping over the fudge. This provides a necessary contrast. It’s airy and light, which keeps the entire dessert from feeling too heavy or dense. A final sprinkle of more crushed Oreos on top adds visual appeal and ties the whole theme together. This specific combination is why people always ask for this Simple Oreo Ice Cream Dream Cake by name.
Assembling Your Simple Oreo Ice Cream Dream Cake
Now we get to the fun part: building this incredible dessert. The assembly process is straightforward, but the magic lies in the details. Taking a little extra time with each layer is what transforms this from a simple ice cream scoop into a true Simple Oreo Ice Cream Dream Cake. This is where you create those distinct, beautiful layers that look so impressive when you slice into them. Don’t rush the freezing times; they are the most important secret to success. We will walk through creating the perfect crust and then stack each layer of flavor. Let’s build your cake.
Mastering the Perfect Buttery Oreo Crust
The foundation of your Simple Oreo Ice Cream Dream Cake is the crust, and a great crust is all about texture. You need it to be crunchy, firm, and easy to press into the pan. You will start with a full package of regular Oreo cookies. For this, you absolutely use the entire cookie, cream filling and all. That cream filling adds a bit of sweetness and helps the crust bind together. You have two easy options for crushing them: a food processor for fine crumbs or a sealed plastic bag and a rolling pin for a more rustic texture.
Once you have your crumbs, you’ll mix them with melted butter. The butter is the glue that holds everything together. Make sure you mix it thoroughly until all the crumbs are moistened. Now, press this mixture firmly and evenly into the bottom of your 9×13 inch pan. I like to use the bottom of a flat measuring cup to really pack it down tightly. This tight packing is what prevents the crust from crumbling apart when you serve your Simple Oreo Ice Cream Dream Cake. While some people make a quick dessert using ice cream sandwiches as the base, this homemade crust provides a superior crunch and flavor. Before you add anything else, you must freeze this crust for at least 15-20 minutes. This solidifies the butter and creates a firm base that will not mix with the ice cream layer.
Layering Secrets for Maximum Flavor
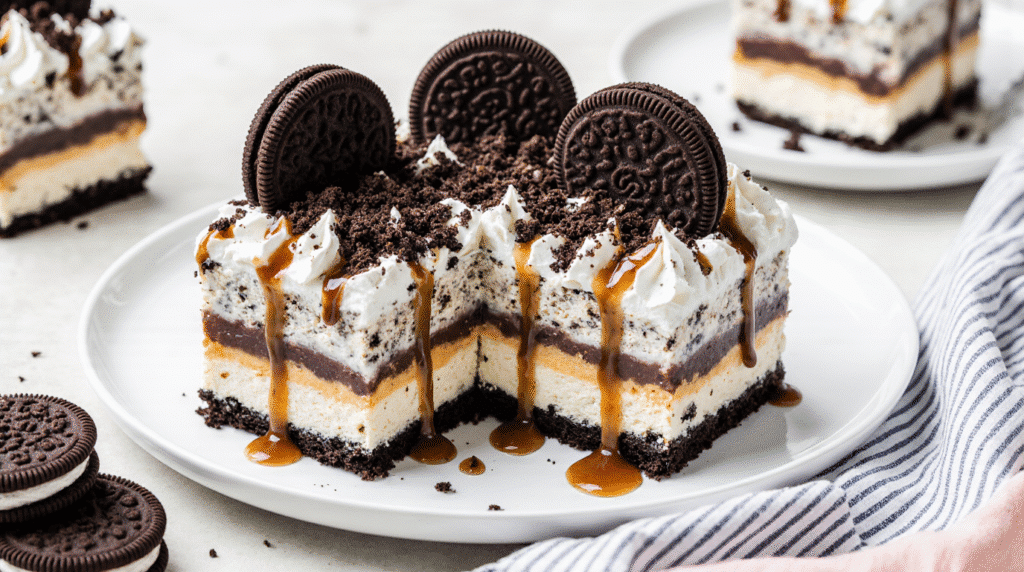
With your crust perfectly chilled, it is time to layer. The first rule of layering is to work quickly but deliberately. Your biggest helper here is softened ice cream. You should take your cookies and cream ice cream out of the freezer about 10 to 15 minutes before you need it. You want it to be soft and spreadable, but not melted or soupy. Plop large spoonfuls of the softened ice cream all over the frozen crust. Then, use an offset spatula or the back of a spoon to gently spread it into one even, smooth layer. Once it is smooth, it goes back into the freezer. You must freeze this layer for at least one hour, or until it is firm to the touch.
After that hour, your ice cream layer is solid. Now you add the fudge. You want the hot fudge sauce to be at room temperature or just slightly warmed. Pour the fudge sauce over the frozen ice cream and spread it quickly into an even layer. This rich, chocolatey element is a classic part of so many no-bake treats, including my popular Chocolate Lasagna Recipe.
What comes next? Back to the freezer. This fudge layer needs at least 30-45 minutes to set up. Once it’s set, you will add the final layer of thawed whipped topping. This recipe uses a thawed topping for stability, which is a great shortcut. Many classic heavy whipping cream desserts require you to whip your own cream, but that can sometimes weep or freeze into an icy texture. This method gives you perfect, fluffy results every time, just as a light frosting completes my favorite Easy Vanilla Cupcakes. Finally, sprinkle the remaining crushed Oreos over the top. Cover the pan tightly and freeze for at least 4 hours, or preferably overnight. This final, long freeze is what solidifies your masterpiece and makes this the perfect Simple Oreo Ice Cream Dream Cake.
Pro-Tips and Fun Variations for Your Oreo Cake
You have assembled your layers, and your beautiful cake is now freezing into a solid, delicious block of goodness. You are so close to the finish line. This next section is all about the “wow” factor. It covers the two most important parts of serving: how to get those professional, clean-looking slices that show off every single layer, and how to get creative with easy variations. A few simple tricks can make a huge difference in your presentation. Plus, we will give you some fun ideas to customize this Simple Oreo Ice Cream Dream Cake and make it completely your own.
The Secret to Getting Clean, Perfect Slices Every Time
You have spent all this time creating a beautiful Simple Oreo Ice Cream Dream Cake with perfect, distinct layers. The final step is to serve it in a way that shows off your hard work. There is nothing more frustrating than trying to cut a rock-solid ice cream cake, only to have it crack, shatter, or squish into a messy pile. The secret is simple: temperature and a hot knife. First, remove your Simple Oreo Ice Cream Dream Cake from the freezer about 5 to 10 minutes before you plan to serve it. This short resting period on the counter is just enough to soften the edges slightly, making it much easier to cut without melting the whole dessert.
Next, you need a large, sharp knife and very hot water. Fill a tall glass or a pitcher with the hottest water your tap can produce. Dip the blade of your knife into the hot water for about 10 seconds, then quickly wipe it dry on a clean kitchen towel. Make your first cut, pressing down firmly and smoothly. The heat from the blade will glide right through the frozen layers, including that chewy fudge center. After each single cut, dip the knife back into the hot water and wipe it clean again. This process prevents crumbs and melted ice cream from dragging onto the next slice. It keeps every single piece looking sharp and photo-ready. This hot knife technique is the same one I use for my No-Bake Oreo Cheesecake to get those perfect slices.
Easy Variations for Your Simple Oreo Ice Cream Dream Cake
This Simple Oreo Ice Cream Dream Cake recipe is fantastic just as it is, but it also serves as a perfect base for your own creativity. The easiest way to change things up is with the ice cream. You are not limited to cookies and cream! Imagine this cake made with mint chocolate chip ice cream for a “grasshopper” version. Or, try peanut butter cup ice cream, and swap the hot fudge for a layer of peanut butter sauce. You could even use strawberry or coffee ice cream. As long as the flavor pairs well with chocolate, you are good to go.
You can also get creative with the toppings and layers. Instead of just hot fudge, add a layer of thick, gooey caramel sauce right on top of it. Before you add the whipped topping, sprinkle a cup of chopped peanuts, pecans, or walnuts over the fudge layer for an extra crunchy, nutty texture. You can even mix things up in the crust. Add a teaspoon of instant espresso powder to your Oreo crumbs to give the crust a deep, mocha flavor. These simple swaps can make your Simple Oreo Ice Cream Dream Cake feel new and exciting every time you make it, much like how you can customize a batch of Brown Butter Chocolate Chip Cookies with different mix-ins. The core method stays the same, but the flavor combinations are endless.
Serving, Storing, and Answering Your Questions
Your Simple Oreo Ice Cream Dream Cake is now fully assembled, frozen solid, and ready for its big debut. This final part is all about handling it correctly. We will cover the best way to make this dessert ahead of time and store it properly. This ensures it tastes just as fresh and delicious on day three as it did on day one. We will also give you a few simple ideas for presentation. These tips will make your dessert the true centerpiece of the table. Finally, we will answer some of the most common questions you might have about making this Simple Oreo Ice Cream Dream Cake.
Make-Ahead and Storing Instructions
One of the greatest advantages of this Simple Oreo Ice Cream Dream Cake is that you must make it ahead of time. This makes it the perfect party dessert. It removes all last-minute stress. You can make this cake up to one week in advance. The key to storing it perfectly is protecting it from air, which is the enemy of ice cream and the cause of dreaded freezer burn. Once your cake has completed its final 4-hour (or overnight) freeze, it is solid. You must cover it tightly.
Your first layer of defense is plastic wrap. Press it gently but snugly against the surface of the whipped topping. Then, wrap the entire pan, including the bottom, with another one or two layers of plastic wrap. For extra protection, especially for longer storage, add a final, tight layer of aluminum foil over the plastic wrap. This double-barrier method locks in freshness and prevents any unwanted freezer odors from seeping in. When you are ready to serve, just remove the foil and plastic wrap, let it sit for 5-10 minutes, and slice. This make-ahead convenience is a huge time-saver, much like prepping my Easy Freezer-Friendly Meatballs before a busy week.
Perfect Pairings and Presentation Ideas
You are ready to serve your Simple Oreo Ice Cream Dream Cake. You already know the hot knife trick for clean slices. Now, let’s talk presentation. This cake is rich, so it pairs wonderfully with simple beverages. A cold glass of milk is a classic choice for kids and adults alike. For a more grown-up pairing, a hot cup of black coffee or a smooth espresso provides a perfect, bitter contrast to the cake’s sweetness.
When plating, you can add a few simple garnishes to make it look even more professional. Drizzle a little extra chocolate or caramel sauce on the plate before placing the slice on top. Add a small dollop of fresh whipped cream next to the slice. You can even top it with a single, fresh strawberry for a beautiful pop of color. These simple touches take just a few seconds but elevate the entire dessert. It shows you put in that extra effort, similar to the presentation I use for my special Strawberry Stuffed French Toast. Your guests will definitely be impressed before they even take their first bite.
Frequently Asked Questions
Can I make this Simple Oreo Ice Cream Dream Cake in a round pan?
Yes, you absolutely can. A 9-inch springform pan is a fantastic choice for this Simple Oreo Ice Cream Dream Cake because it allows you to remove the ring for a stunning presentation. The layering process is exactly the same. Just be sure to press the crust firmly up the sides of the pan as well, about 1 inch high, to create a strong base.
How long does the ice cream cake need to freeze?
This Simple Oreo Ice Cream Dream Cake needs to freeze in stages. The crust needs at least 15-20 minutes to get firm. The first ice cream layer needs at least 1 hour to solidify. The fudge layer needs another 30-45 minutes to set. After you add the final layer of whipped topping, the entire cake needs to freeze for a minimum of 4 hours, but overnight is highly recommended. This ensures your Simple Oreo Ice Cream Dream Cake is completely solid and slices perfectly.
Can I use homemade whipped cream instead of whipped topping?
You can, but it requires one extra step. Standard whipped cream does not freeze and thaw well; it can become grainy or watery. If you want to use homemade cream, you must stabilize it first. You can do this by whipping 2 cups of heavy cream with 1/2 cup of powdered sugar and 1 teaspoon of vanilla until soft peaks form. In a separate bowl, dissolve 1 teaspoon of unflavored gelatin in 2 tablespoons of cold water, then gently warm it (do not boil) until liquid. Slowly beat the liquid gelatin into your whipped cream until stiff peaks form. This stabilized cream will freeze beautifully.
What is the best way to crush the Oreos for the crust?
You have two great options for the Simple Oreo Ice Cream Dream Cake crust. For a fine, uniform crumb, a food processor is the fastest and most effective method. Just pulse the cookies until they are fully broken down. If you prefer a more rustic crust with some larger cookie pieces for texture, or if you do not have a food processor, use a large zip-top plastic bag. Place the cookies inside, seal it, and crush them with a rolling pin or the bottom of a heavy pan.
Conclusion
This Simple Oreo Ice Cream Dream Cake is truly one of the easiest and most rewarding desserts you can make. With its crunchy chocolate crust, creamy ice cream center, rich fudge ribbon, and light, fluffy topping, it hits every note. It is the perfect solution for any celebration, especially on those hot days when turning on the oven is simply not an option. This recipe is all about simple assembly and letting the freezer do all the hard work for you. I hope this becomes your new go-to, stress-free dessert for birthdays, barbecues, and any day that just needs a little something special. Enjoy!

